10/17/2005
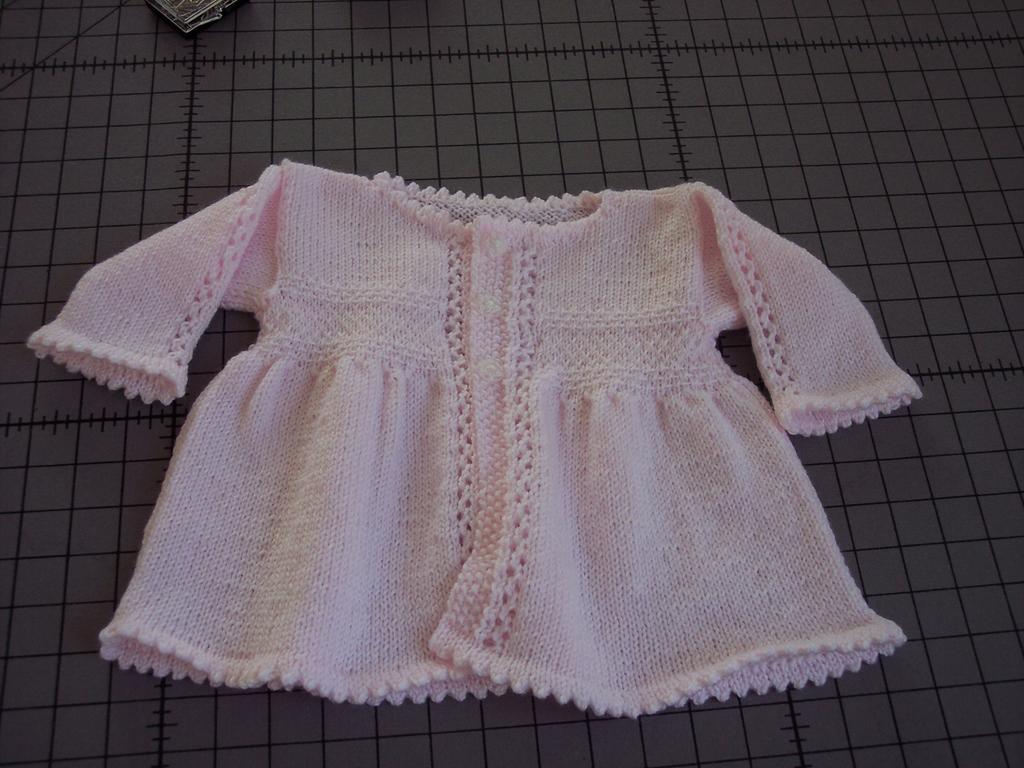
FO: SamanthaTada!! Another FO on the same week! It speaks nothing of my productivity, however, just my procrastination in finishing everything up at the last minute. =P Anyways, this knit is for C&A's little Maya, also due sometime in November. C&A are dear friends of ours, who are in town, so maybe one day I can catch a glimpse of little Maya wearing this (depending on how much the parents will like this gift, no obligations of course!)
But no knit is without some flaws (at least mine aren't). But I'm not a type A sort of knitter, so I left them there, to make this special knit even more "unique" (actually, I was just to lazy and frustrated to rip back). There are some glaring ones that I will present to you:
Exhibit A: (Top: left sleeve details; Bottom: right sleeve details)
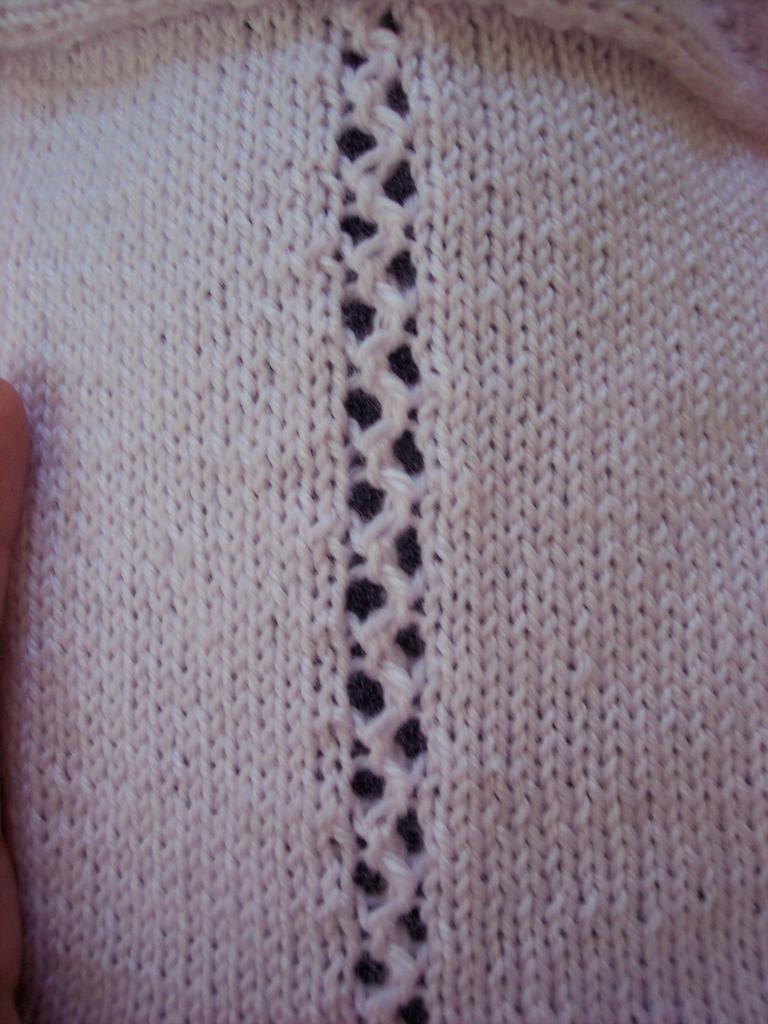

Exhibit B: (Top: left front bodice details; Bottom: right front bodice details)


Pattern: "Samantha," by Kate Gilbert.
Yarn: 1 skein Red Heart TLC Baby in Powder Pink (100% Acrylic)
Needle: US #3 (24") circular, US #4 straights, US #4 (24") circular
Accessories: 1 stitch marker, LOTS of scrap yarn to hold live sts
Gauge:
Additional Notes:
Pattern
Overall I really enjoyed the pattern. Very organized (even color-coded for all the different sizes throughout the pattern!). I liked the details on the bodice and the sleeves, and even the little ruffles to create a little dress-like effect. To make the edging, the pattern tells you to hold live sts and then after folding over, sew on the live sts onto the WS - it looks and feels nicer than actually binding off and then folding over to sew in (which I did for my lavendar Baby Bonnet and Sweater Set). There also were some confusions along the way, however, but Kate was able to email me back in a timely manner to help me with my questions. A couple things to keep in mind for myself:
- When working the buttonholes for the right front bodice, do backward loop cast-on when asked to CO2.
- When doing sleeve detailing, make sure the marker is immediately before the center 2 sts (for the RS). On one of the sleeves, I didn't keep track of where my marker was and my carelessness resulted in Exhibit A (see above).
A couple things I changed in the pattern:
- The decreases on the sleeves; when working decrease rows on the WS, the pattern says to SSK. That didn't make sense since it was a purl row (and it looked terrible when I did it) so I substituted in SSP instead. Much better.
- I rewrote the entire "Left Front Neck Shaping" section. Reasons being, when I read the original instructions, it didn't make sense. It seemed like it was actually making a different version of right front neck shaping, and it was backwards. I even attempted it (with a lifeline, of course) and it looked the mirror version of what it was supposed to be. So after scratching my brain REALLY hard (ouch), I successfully made my own version of "Left Front Neck Shaping" (for size 3 months):
Row 37: K until 5 sts rem on left needle, k1, p1, k1, p1, k1.
Row 38: Work 8 sts in patt (place these onto circ needle). With straights, sl1, p across.
Row 39: K to last 4 sts, place these sts onto circ needle, turn.
Row 40: Sl1, p across.
Row 41: K to last 3 sts, place these sts onto circ needle, turn.
Row 42: Sl1, p across.
Row 43: K to last 2 sts, place these sts onto circ needle, turn.
Row 44: Sl1, p across.
Row 45: K to last 1 st, place these sts onto circ needle, turn.
Row 46: Sl1, p across.
Whew!!!!